
Do plastic bumper repair kits work?
Published on 28 July 2021
Do plastic bumper repair kits work?
Accidents happen and car bumpers often get scratched up. However, the good thing about plastic bumpers is that the plastic cover is usually easier and cheaper to repair than metal and chrome car bumpers.
People often want to try out DIY test kits when it comes to fixing up their vehicles, often under promises that this method is far cheaper and quicker than going to a professional.
Plastic bumper repair kits sound like a DIY dream but do they actually work? We’re going to provide a lowdown on plastic bumper repair kits and put them to the test.
What is a plastic bumper repair kit?
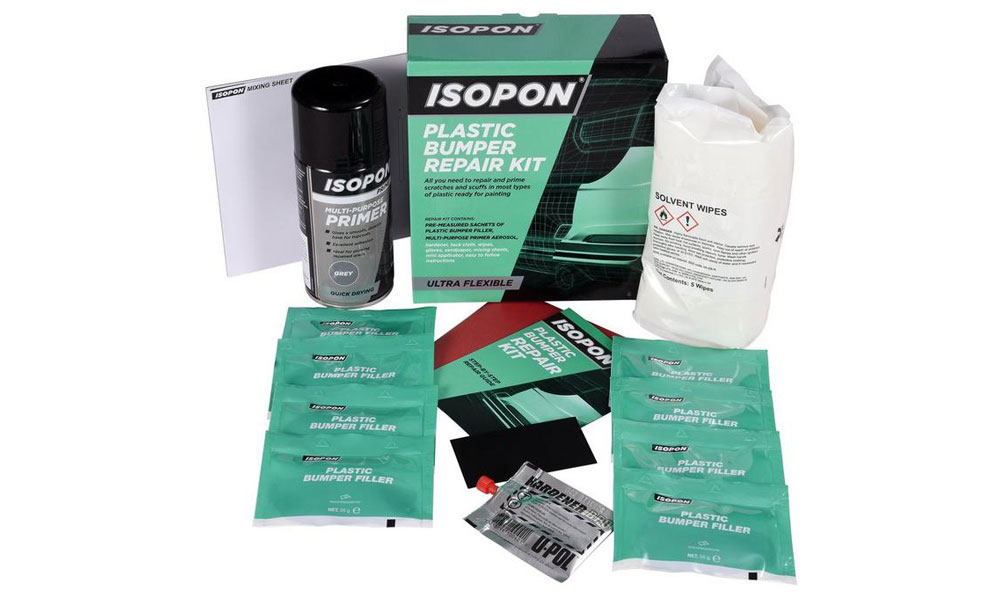
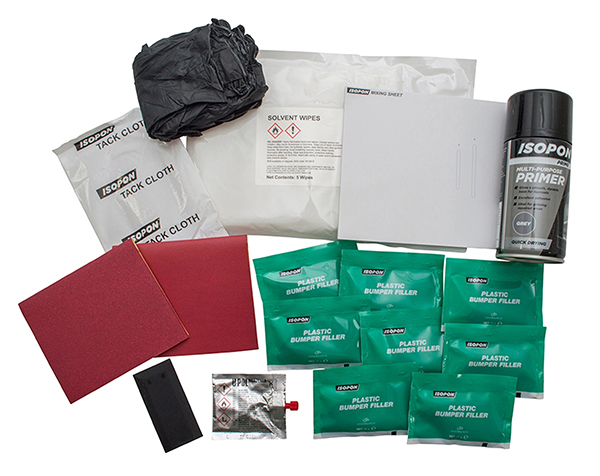
A plastic bumper repair kit contains a number of items used to fix minor scratches and scuffs to plastic. Generally what is included in a repair kit is primer, pre-measured sachets of filler to apply to the bumper and solvent wipes. These kits will not provide paint or finishing products.
How does a plastic bumper repair kit work?
When using a DIY plastic bumper repair kit, you should make sure that you carry out the repair in a spacious, private environment as these tasks can be very fiddly and require a steady hand as well as deep concentration.
Scuffs and scratches can be repaired on the front side of the bumper alone but splits and cracks should be dealt with from the front and the back.
How to use the kit:
- Using the solvent wipes, clean both the inside and outside of the bumper as dirt and grease can prevent the filler from bonding and tarnish the finishing appearance.
- Examine the affected area and make sure that any shards of plastic are removed carefully.
- Sand down the affected area with 80 grit sandpaper to smooth out sharp or raised edges, leaving a rough surface (this will bond better with the filler).
- Wipe away dust with a damp cloth.
- If the bumper has split or is cracked, line up the front and back sides so that they are level and hold the front side in place using masking tape. Then, repair the back of the cracked bumper. If your kit contains a solution to help bond the filler to the plastic then you should apply this first and then wait for it to dry.
- Apply a layer of filler over the affected area and beyond. It will start to dry quickly so this needs to be carried out quickly too.
- Cut the bonding mesh to size, allowing an inch more over the damaged area and place it over the damage, pinning two sides of the crack in place.
- Apply a layer of filler over the mesh to cover it up before smoothing it out and waiting for it to harden. You will be told in the instructions of your kit how long you need to wait.
- Take off the masking tape and sand down the damage on the front of the bumper to roughen the surface.
- Apply filler to the damaged area and smooth it out (you could use a squeegee for this), pushing the filler into the scratches and filling them to the bottom. Then, allow the filler to dry and harden.
- Sand the area using 80 grit sandpaper and if necessary, apply another layer of filler.
- Once the filler has hardened, use a wet fine grit sandpaper to finish.
- Apply at least two layers of primer and paint to the bumper. Wait for it to dry.
- Apply at least two layers of clearcoat over the finished paint. Wait for it to dry.
- Leave your work to dry, preferably overnight.
What are the benefits of a plastic bumper repair kit?
It’s cheap
One of the biggest selling points when it comes to DIY repair kits is the price tag. These kits are often reasonably priced, making them popular for those who don’t want to spend money on a professional repair.
It’s convenient
Having your own plastic bumper repair kit that allows you to fix up any bumper scratches and cracks at a time that suits you (in theory) is another reason why people invest in their own kit. The do-it-yourself formula allows owners to conduct their own repairs time and time again.
What are the drawbacks of a plastic bumper repair kit?
It’s risky
For inexperienced individuals, trying to fix the bumper yourself can be risky. If you don’t fully know what you’re doing, you can end up making the damage look worse and have a DIY disaster on your hands.
It might end up costing you more money
If you end up creating more damage or you make a mistake, you will have to spend money on getting the damage fixed.
It will never look perfect
Unlike a professional repair service that has experienced specialists on hand to conduct repairs, using a DIY kit will never produce a perfect finished product.
These kits rarely live up to expectations and in spite of their convenience, it is always advised to go to a professional for your repair.
Mendadent specialist plastic bumper repair service
Mendadent is a specialist auto body repair shop, with a team of skilled repair specialists on hand to restore your vehicle to its former glory.
We provide a professional car bumper repair service to those needing minor scratches, scuffs and cracks fixed up.